
These two were unfortunate victims of a bad decision. Both of them were rescues and had suffered horrible paint jobs. One of them was put together incorrectly. However I decided to put the two Vindis through something even worse. I put them in the oven...
I'm always experimenting with primers, as well as spray paints. I went for a midnight blue rustoleum spray, however upon application it left a strange textured effect I wasn't expecting. It was a clear day, not too cold, nor was it raining. Even worse than the texture, the paint didn't want to dry. Since I didn't have any varnish I decided to try something new.
The plastic in most modelling kits melts around 130F. I figured I could speed up the curing process of the paint by putting the models in the oven at about 105 with no ill effects, as long as I watched the models closely.
However, I forgot the oven wouldn't have a uniform temperature, or be perfectly calibrated. In short I ended up seriously damaging the siege shield and lascannon barrels on my models. I even warped the body of one of them. There was other minor damage, such as the tracks actually melting in a few places.
The paint cured, but the strange texture remained.
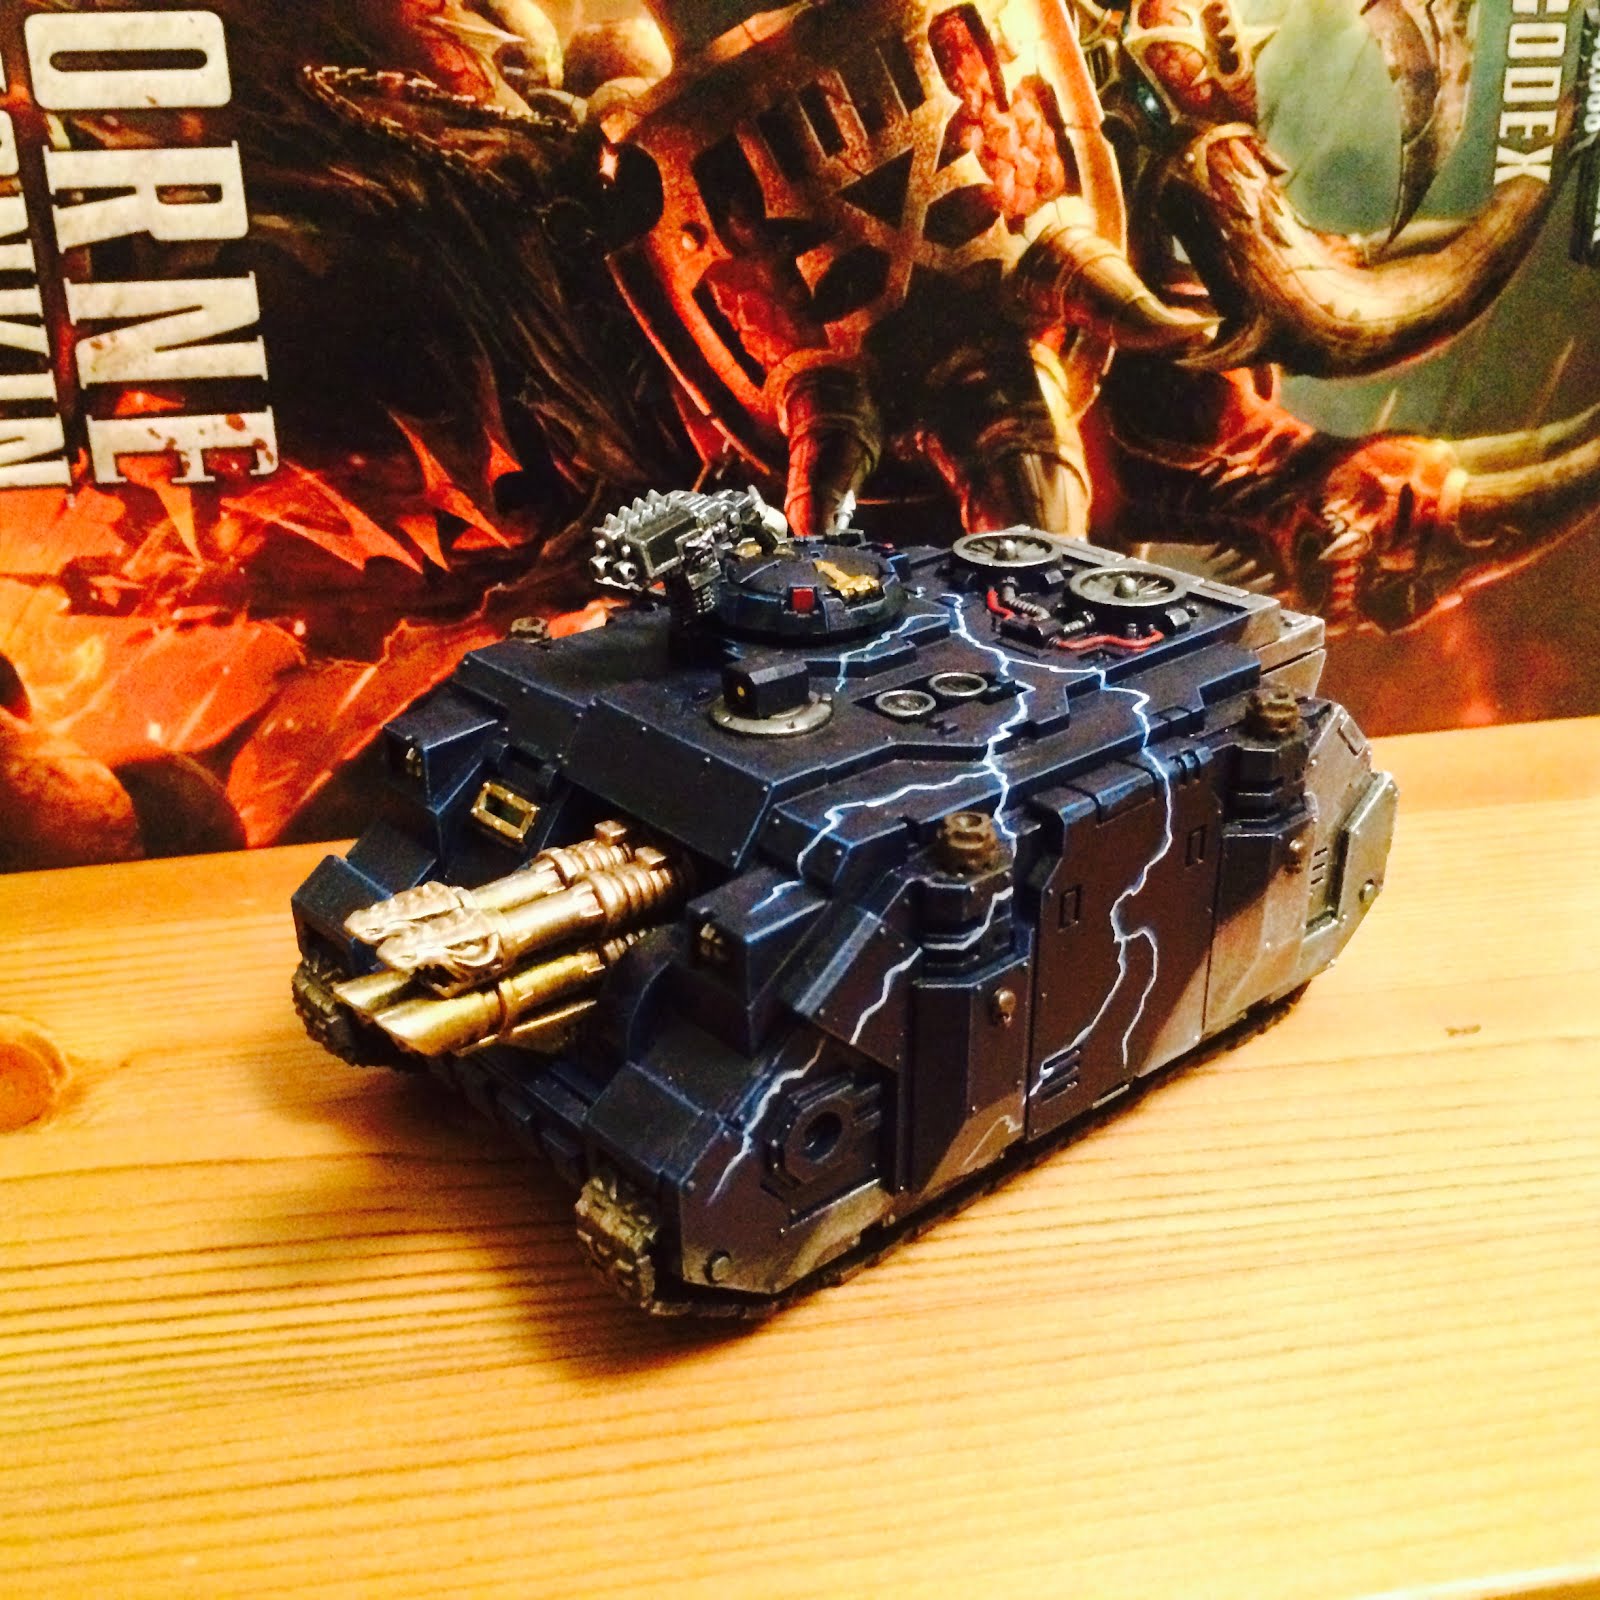
I cut the lascannon barrels off as necessary, and replaced them with either new cannons or replaced the end of the cannon with a gargoyle head. Then I ended up applying a very thin, wash-like coat of the old GW Necron Abyss foundation paint to the entirety of both models. I repeated this until the texture was manageable. My siege shields were totally destroyed, so I threw them out. In hindsight I could have kept them for terrain. The warped body I tried use superglue and a hobby vice, but the damage was too severe. I decided to leave the damage and just paint over it. Maybe I'll treat it as battle damage with some careful painting.
With careful painting I've managed to salvage the two tanks. Albeit they aren't perfect. They're currently at about 90% complete. I just need to add some weathering and pick out a few details missed.


One thing that I can't really show in pictures is the interference paint I used. Golden makes a fantastic paint that causes the reflections to show as a different color than underneath. For example if I used a green interference paint over a blue undercoat, all the reflected light will flash green but the model will be blue to the eye. I'll see if I can get some good pictures and do a review in the future.
No comments:
Post a Comment